Blog 
Click here to go back
Customize QuickBooks Reports

Report Customization

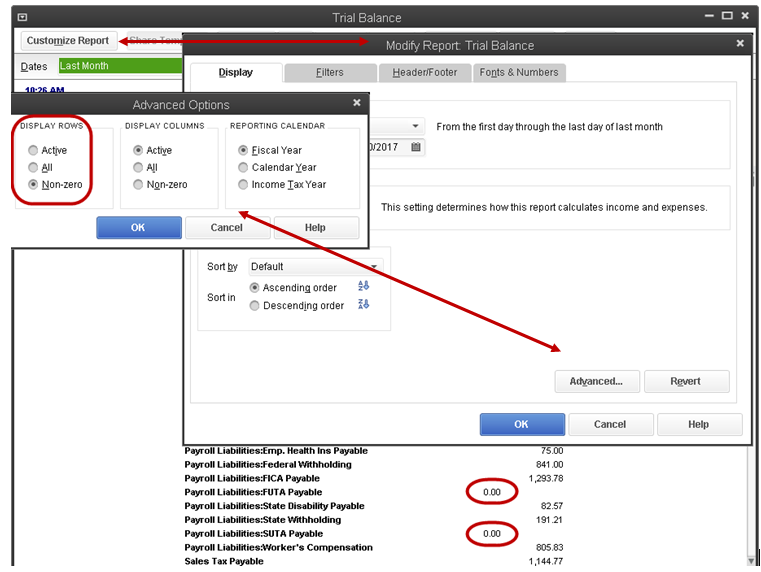
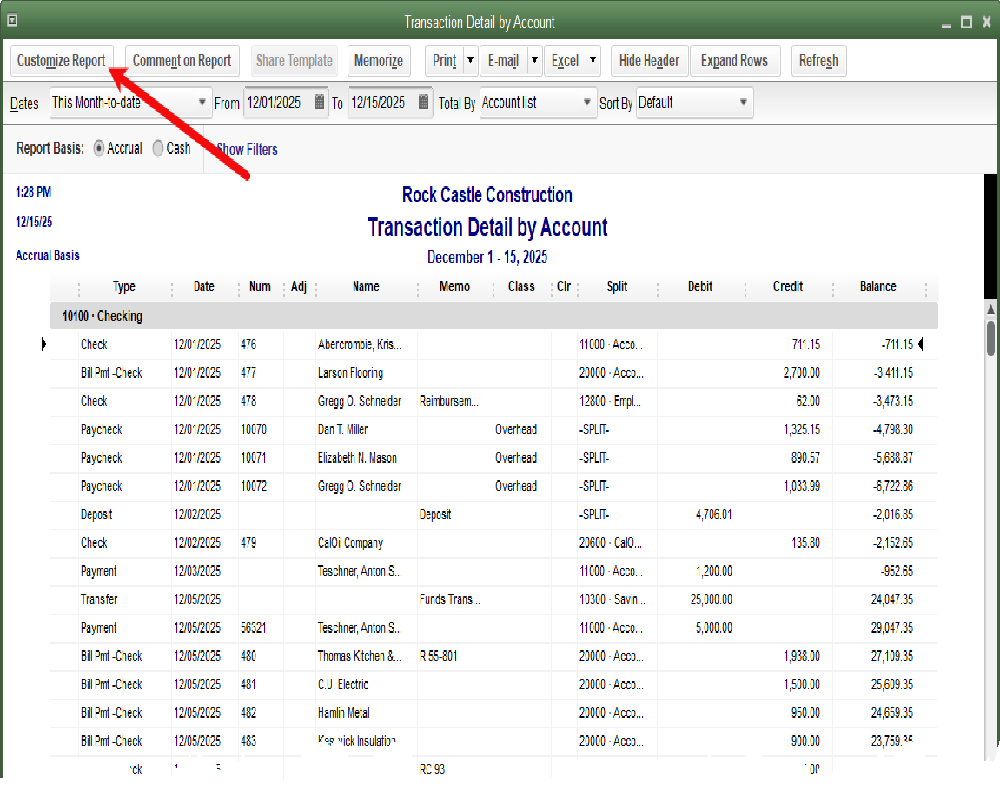
Every QuickBooks report allows some level of customization. Most of these options are accessed from the Customize Report button. Some versions of QuickBooks may use the terminology, Modify Report, but it is the same feature.

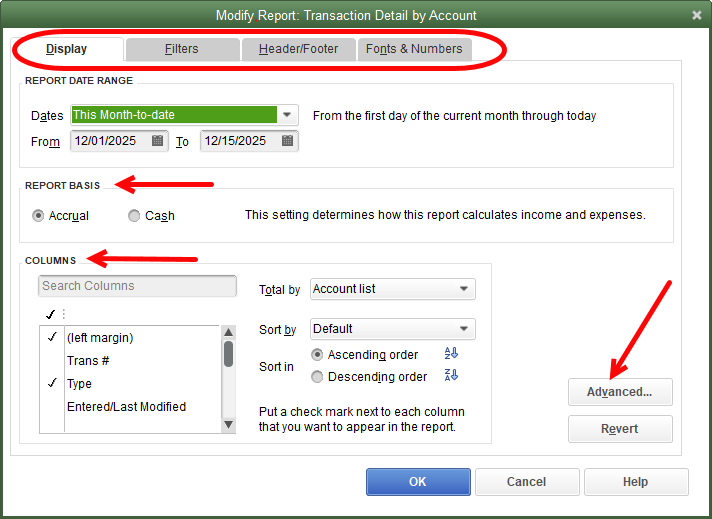
The Modify Report screen opens at the Display tab. As can be seen from the screenshot, it is possible to change the report basis to Cash. It is possible to delete some of the columns on the report and to add others not shown by default. The Advanced button will show different options depending on the report being customized.

One of these functions is to suppress zero lines and/or columns in a report.

The advanced button for an A/R Aging Report controls which date QuickBooks will use to populate the report. Report Date will include open transactions as of the date of the report. Current Date will show all transactions currently open on the report.

The Filters tab contains the most powerful settings.
In the screenshot, the filter for Accounts is selected. The setting is for All Accounts. This setting doesn’t really filter out anything. All accounts are included.
Other options would be to select only one account, certain selected accounts, or a specified group of accounts, like All Ordinary Income accounts.
There are countless examples how this might be used.
For instance, Sales Tax reports by default, include all transactions created on a sales document; an invoice, a sales receipt, or credit memo.
In some situations, a client may need to use sales documents to record other events as well. These events might impact COGS or an expense account rather than income.
Filtering the Sales Tax Liability report by “All Ordinary Income” accounts will filter out the transactions not affecting sales.
Reports can be filtered for many other statuses.
1. Create a list of bills that have been paid or not.
2. Include transactions that have been printed, or not
3. Report on transactions in a certain date range, or using certain items.
4. Payment date, name of vendor, customer, or employee, sales tax code, sales rep, and on and on.
All these can be filtered on transaction reports in QuickBooks.

The remaining two tabs have more to do with appearance.
On the Header/Footer tab, you can create your own custom report name. That name will appear at the top of the report on screen or printed.
Note all the checkboxes allowing certain information to be displayed or removed. Familiar notations like date prepared, time prepared, etc. are optional and can be removed from the final report.
There is room for a footer line to be added to the report.
The right side of this tab allows the user to specify how some of these lines should be displayed. The footer lines will appear on the report as shown here by default, the Standard setting. Or, they can be centered at the bottom of the page by changing the Alignment setting.

The final tab is again for appearance. The Change Font button allows the font used in the report to be changed. Not just the style, but the size and colors as well.
Negative numbers can be shown in parentheses by choosing the setting in the right-side section. Reports may display amounts in whole dollars only, among other things.
Choosing the option to show whole dollars only, can cause footing issues, as no rounding account will be selected and used by QuickBooks. The numbers behind the decimal point will be dropped on the printed report.
Often reports created using any number of these criteria may be needed in the future. Memorizing the report will save your customizing work. It will allow the report to be accessed time and again, without having to spend the time creating or customizing it.

Simply click on the Memorize button. Type in a report name that is descriptive enough for you to recognize. Now, access your custom report from Reports->Memorized Reports any time you need it.


